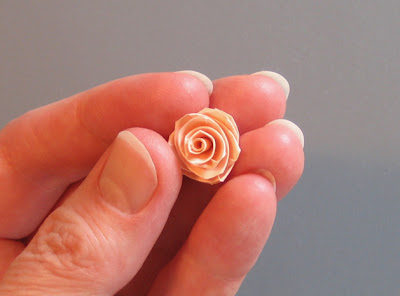
If you've been steering clear of folded roses because they seem too complicated, fear not. Just a few supplies and repetitious steps, and you'll soon realize they're really quite simple.
Quilling paper - any width will work, but 3/8 inch or 1/4 inch are used most commonly. Both are available as standard sizes or cut your own strips. About a 7 inch length makes a nice, full rose.
Quilling tool - slotted tool or needle tool (I'll use a standard slotted tool for this tutorial.)
Scissors
Glue - suitable for paper
Plastic lid - use as glue palette
Paper piercing tool, T-pin, or round toothpick - to apply glue
Directions:
1. Cut a strip of paper 3/8 inch x 7 inches.
2. Slip one end of the strip into a slotted tool from the left. It doesn't matter whether you are right or left handed, as both will have tasks. (speaking of hands... please excuse my winter-ravaged ones!)
 3. Hold the tool vertically in your right hand, the strip in your left, and begin to roll the tool toward the left. Make a few revolutions to secure the paper and form the center of the rose.
 4. Use your left hand to bend the strip straight up at a 90 degree angle. There's no need to crease the fold.
 5. Continue rolling the tool toward the left, rolling over the fold as you go. At the same time, use your left hand to gradually bring the strip back down to a horizontal position. I realize this sounds clumsy, but try it - you'll soon see it becomes a smooth folding and rolling action.
The next three pictures show the fold/roll motion in progress... the first picture is immediately after the first fold, while rolling.
 Farther along - left hand is lowering the strip; right hand is still rolling the tool.
 A little farther...
 Now it's time to fold and roll again.
Tip: Make a new fold just as soon as you've finished rolling the previous one.
 Second fold/roll has been completed. The pic below is just before the third fold.
 6. Repeat the rolling/folding as many times as it takes to use up the strip - that's all there is to it.
Look - a rose is taking shape! This is after six or seven folds... notice it's forming upside down and would make a nice little bud at this stage.
 7. When close to the end of the strip, tear off any excess, slip the rose off the tool, and allow the folds to relax. Shape the rose by gently rotating or untwisting the folds a bit. Hide the torn end of the strip by gluing it to the underside of the rose.
 Tip: A torn paper edge will be less noticeable because it blends better than a sharp cut.
 Finished rose
Tip: Smooth out the center crimp caused by the slotted tool by inserting and rotating the tip of a paper piercing tool or round toothpick.
Stay tuned for an upcoming tutorial on fringed flowers with uneven petals.
Get Informer means To Get Informed on All Information Here. Fun, Songs, Videos, Latest Pictures, Google Ad sense, Urdu SMS, Poetry, Cricket and More. Just Keep Visiting For more Updates
No comments:
Post a Comment